WordPress Logo Slider
User Manual of The Logo Slider wp Plugin by LogicHunt.com
v1.0.1
Introduction

Thank you for using the WordPress Logo Slider Plugin!
Welcome to Logo Slider WP documentation. This documentation will help you understand the requirements and usage of the Logo Slider Plugin. It covers installation, usage, and support.
This documentation only covers Logo Slider WP 3.0 or greater version. If you are using the older version (1 to 2.9.0), please see this WordPress Logo Slider Shortcode Options List
System Requirements
To get the best experience of this plugin, we recommend the following :
- PHP 5.6 or greater version.
- MySQL 5.6 or greater version OR MariaDB version 10.1 or greater.
- WordPress 4.4.0 or greater version.
Getting Started
Plugin Installation
There are 3 ways to install WordPress plugins.
1. Automatic Plugin Installation:
This is the simplest method of installing a plugin. To add a plugin using the built-in plugin installer:
- Log in to your WordPress dashboard
- Navigate to Plugins > Add New
- Find the search form in the top-right and type logo-slider-wp
- Once you have found it, Click the Install Now to install the plugin.
- Click Activate to activate the plugin.
2. Manual Upload via WordPress Admin
- Download the logo-slider-wp.zip from WordPress.org
- Log in to your WordPress dashboard
- Navigate to Plugins > Add New
- Click the Upload Plugin button at the top of the screen.
- Select "logo-slider-wp.zip" from your computer
- Click the Install Now to install the plugin
- When installation is complete, you’ll see “Plugin installed successfully.” Click the Activate Plugin button at the bottom of the page.
3. Manual Plugin Installation Using an SFTP Client
In rare cases, you may need to install a plugin by manually transferring the files onto the server. This is recommended only when absolutely necessary, for example when your server is not configured to allow automatic installations.
This procedure requires you to be familiar with the process of transferring files using an SFTP client.
- Download the logo-slider-wp.zip from WordPress.org
- Extract the logo-slider-wp.zip directory to your computer
- Connect to your WordPress server with your SFTP client.
- Copy the plugin folder to the wp-content/plugins folder in your WordPress directory. This installs the plugin to your WordPress site.
- Navigate to your Plugins admin screen and locate the newly uploaded plugin in the list.
- Click the plugin’s Activate link.
Admin Area Overview
After activate the plugin logo slider will be available for further operation and you can able to manage new logo item and showcase (See to bellow image).
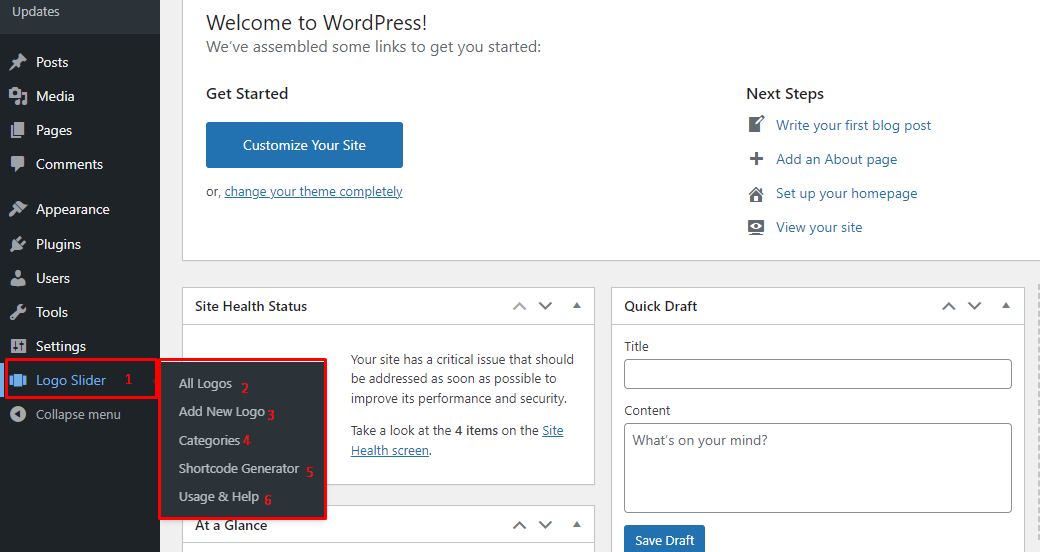
- Appeared "Logo Slider" menu item in the left sidebar.
- See all logo items from here. You can also to sorting item order by drag and drop.
- Add new item with all information.
- Create category to filter all logo items.
- Create Showcase Shortcode. Select layout and customize the logo Showcase according to your demand.
- Simple & Quick user manual.
Single Item Creation
Add New Logo Item
- After activating the plugin, you will see Logo Slider in the WordPress admin dashboard.
- Firstly, Go to Logo Slider → Click on Add New Logo, and add Logo items as many as you want.
- Click on the Publish button to save changes.
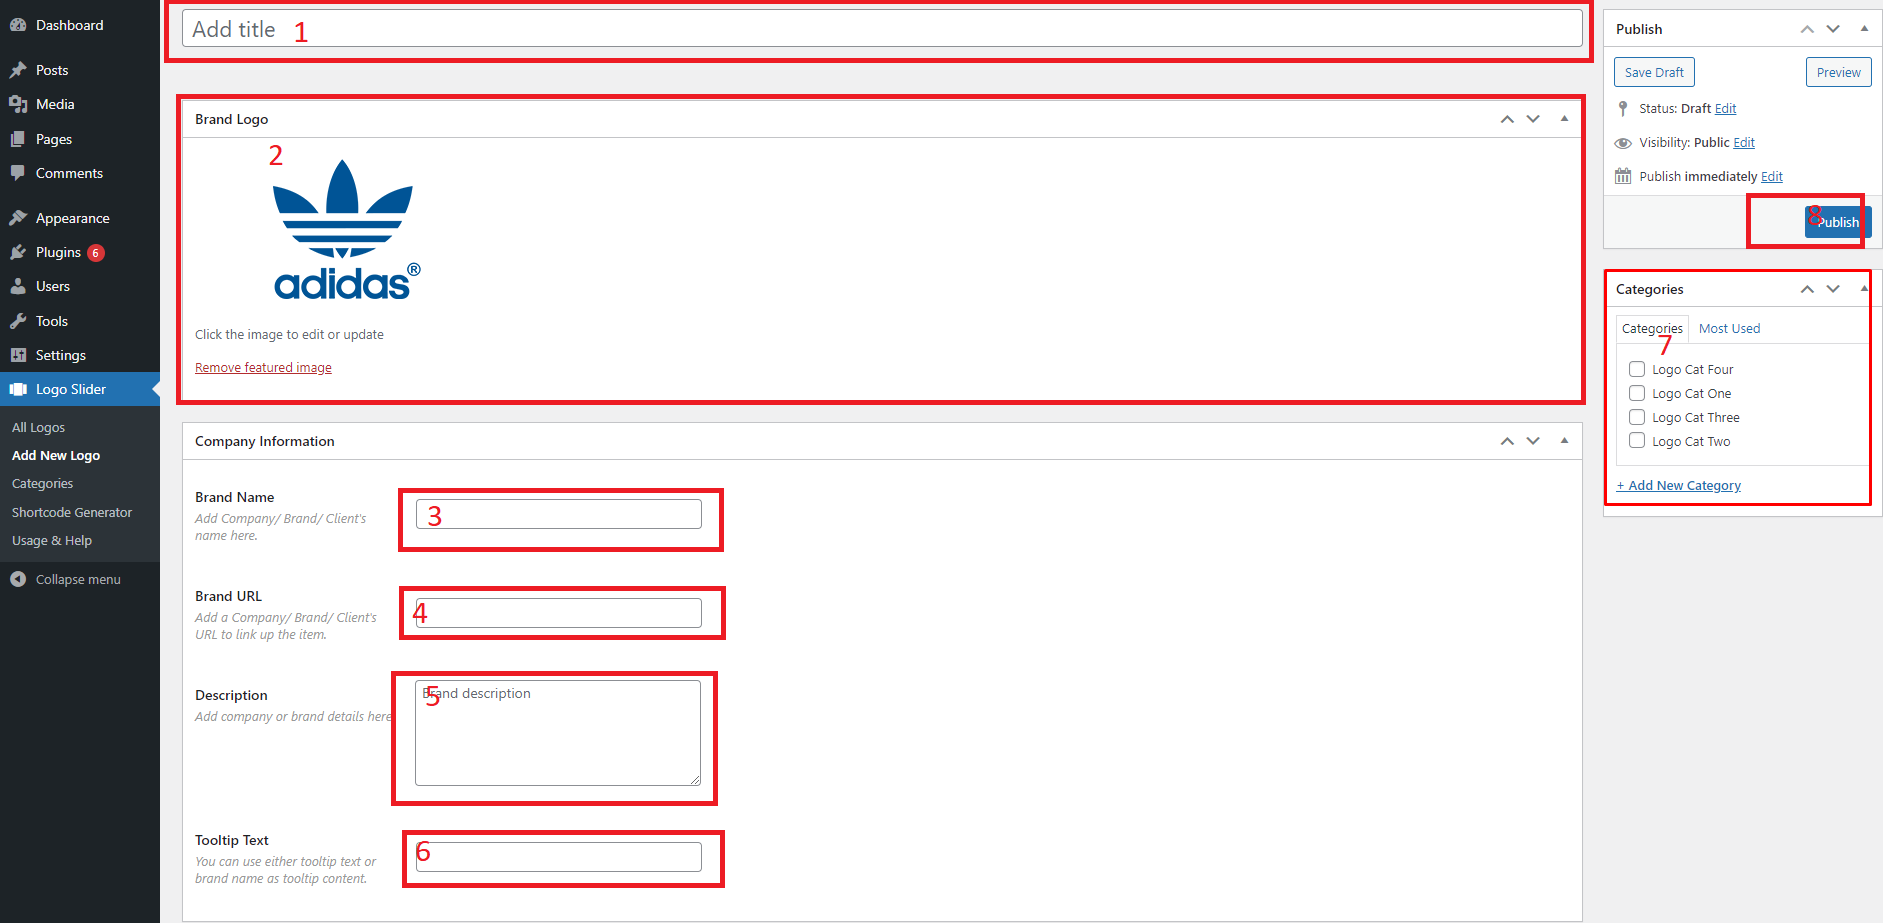
- Item Title. Currently, we didn't use it anywhere on the frontend view. Till now it is only for the backend users to identify & manage the item.
- Add your brand logo image here.
- Put company, brand, or client's name/ title here. It will be shown as the item title on the frontend view.
- Write details about the Brand or company.
- Add tooltip title if you want custom/different text instead of the brand name.
- If you want to filter the item. At first, create categories and assign the item from here.
- Publish/ Update the item.
All Item List
Go to Logo Slider → Click on All Logos, you get all available logo item list. Now you can manage all items according to your demand.
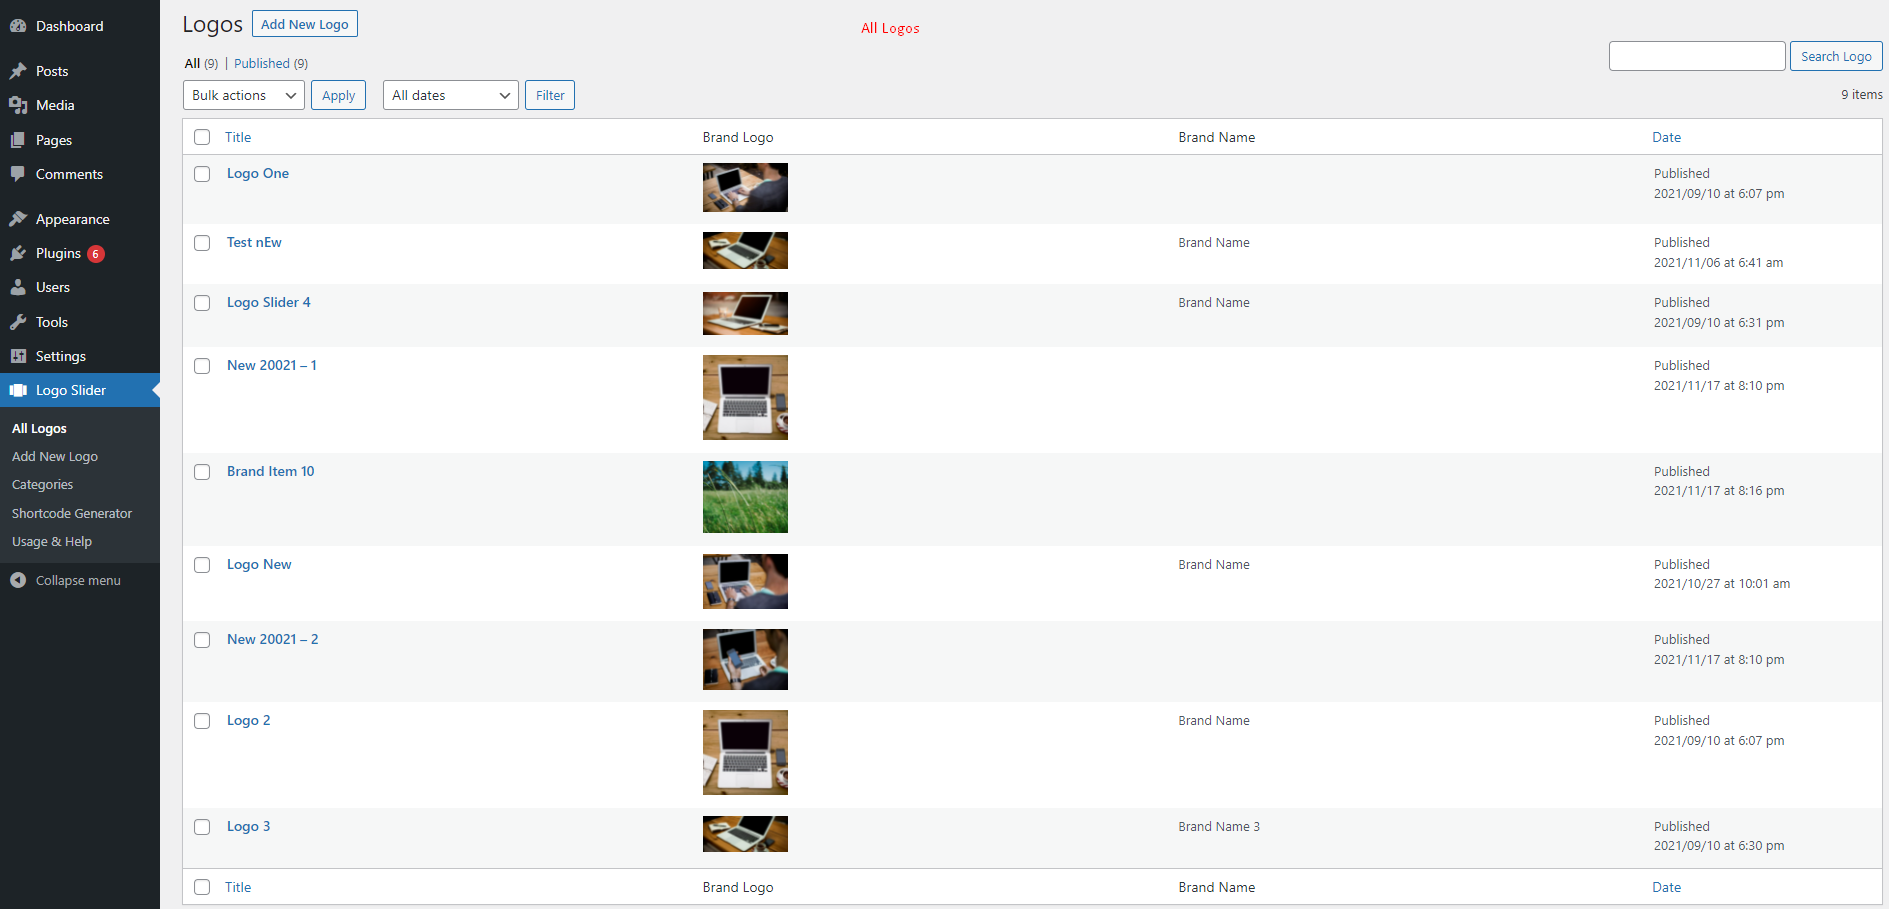
Manage Logo Order
To alter logo item order, please go to Logo Slider → Click on All Logos, now you can change all items order by drag and drop feature. You don't need to save. It will save automatically.
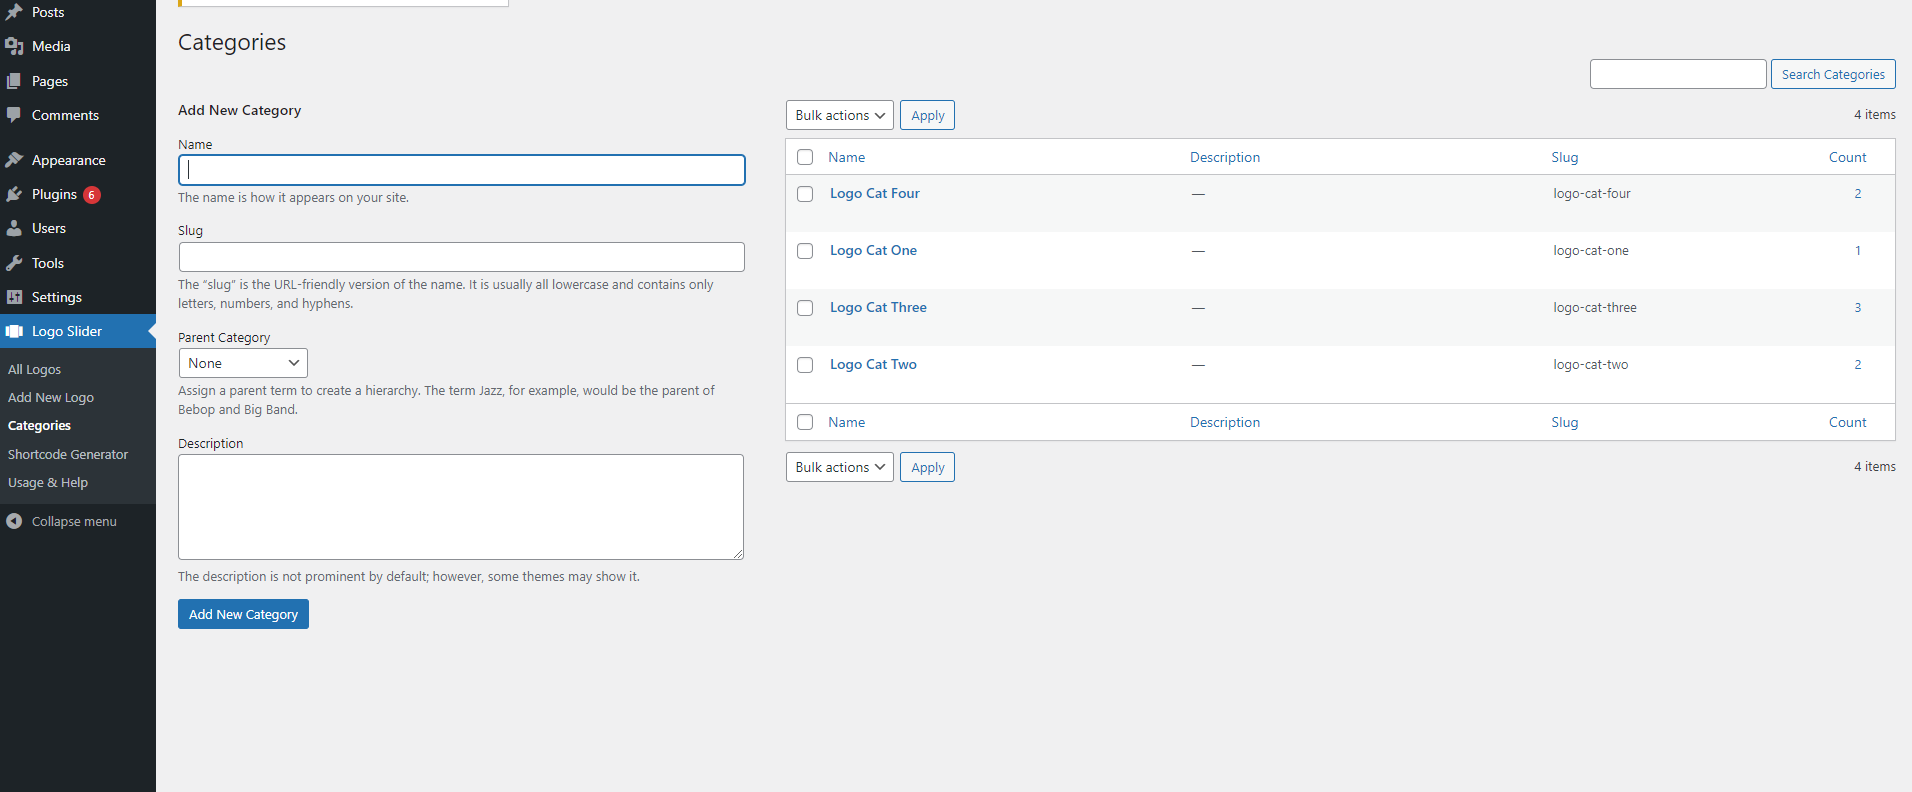
Add New Category
Go to Logo Slider → Click on Categories, add category as many as you want. Also, you can see & manage all existing categories from here.
Showcase Generator
Creating a Logo Slider is super easy and fast. It can be done within a minute. This guidance has been described here for the first time or new user.
STEP 1: Generate Slider Shortcode
- Go to Logo Slider → Click on Shortcode Generator
- Add New slider button
- Type a Shortcode Title (optional).
- You can Customize the Shortcode Generator Setting Tabs as you want. Every Showcase type has its settings.
- And then click on → Publish and you will see a Generated Shortcode in the top area.
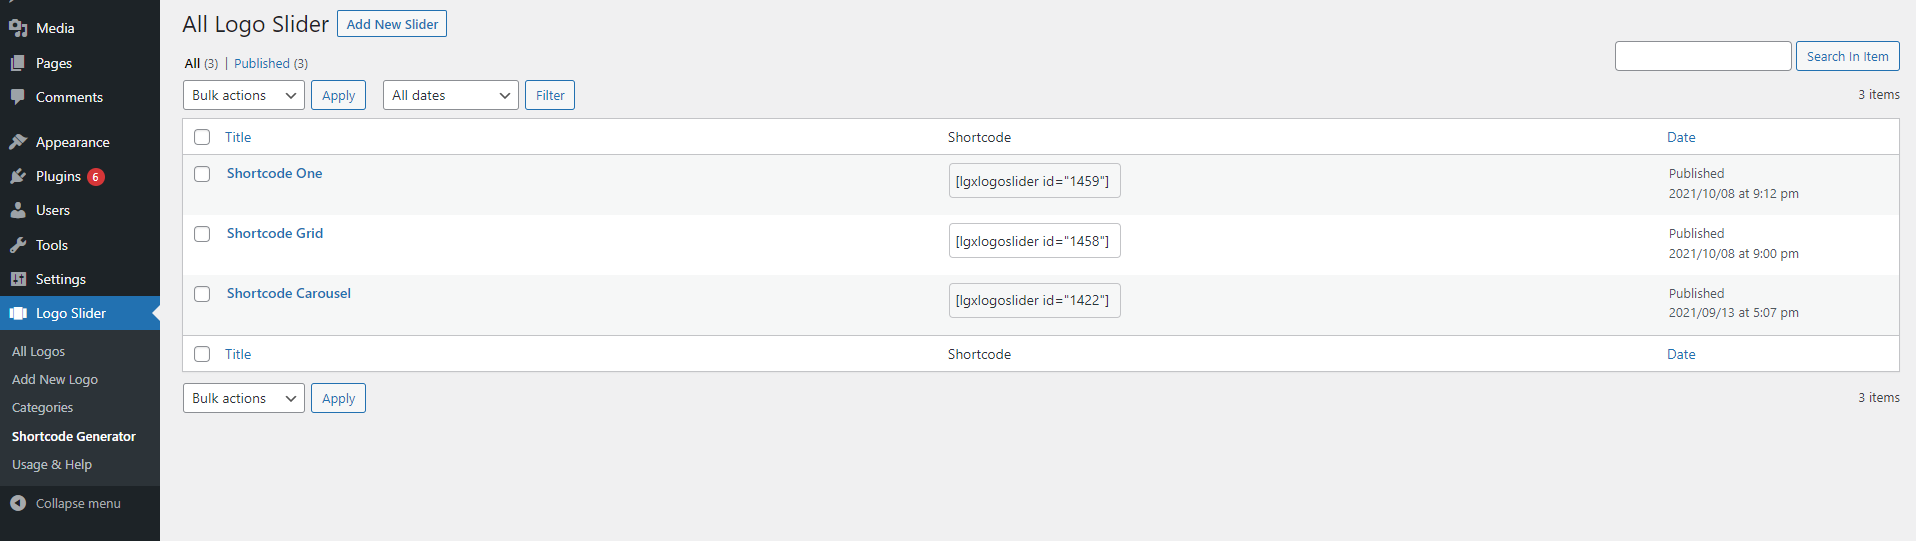
Shortcode List
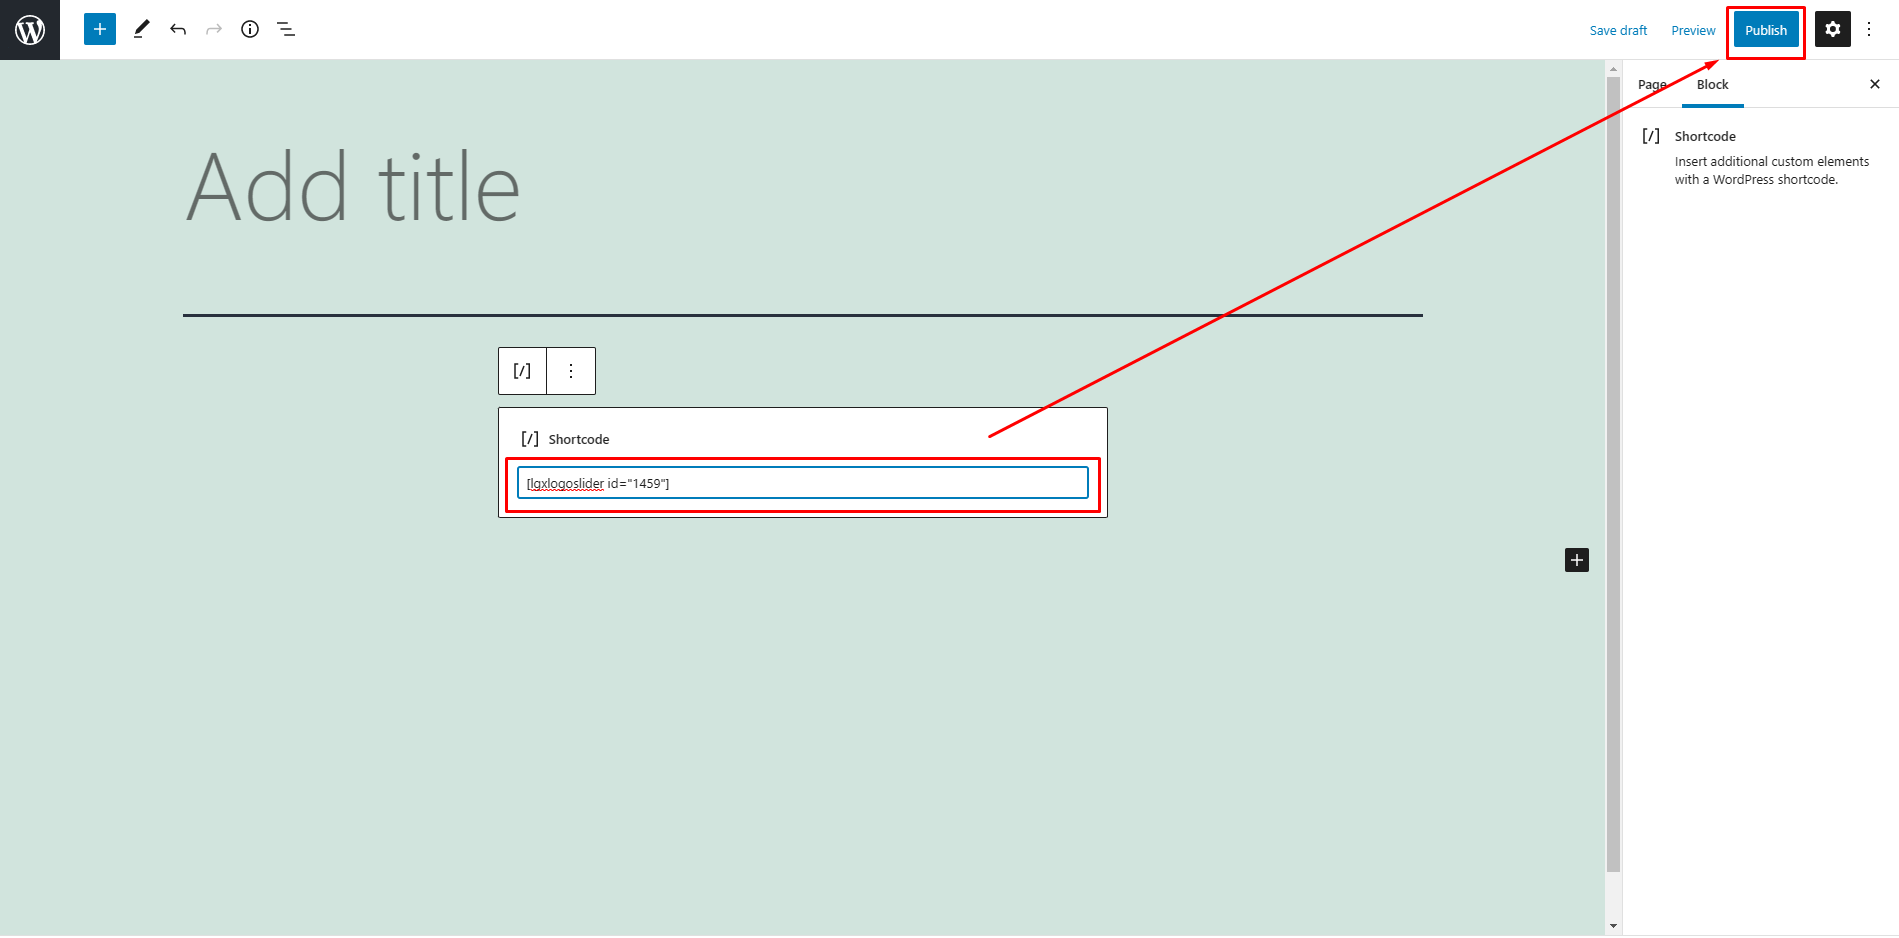
STEP 2: Copy & Use Shortcode
Copy and Paste the logo slider shortcode to your post or page editor or Gutenberg block or anywhere on your site.
Copy Shortcode
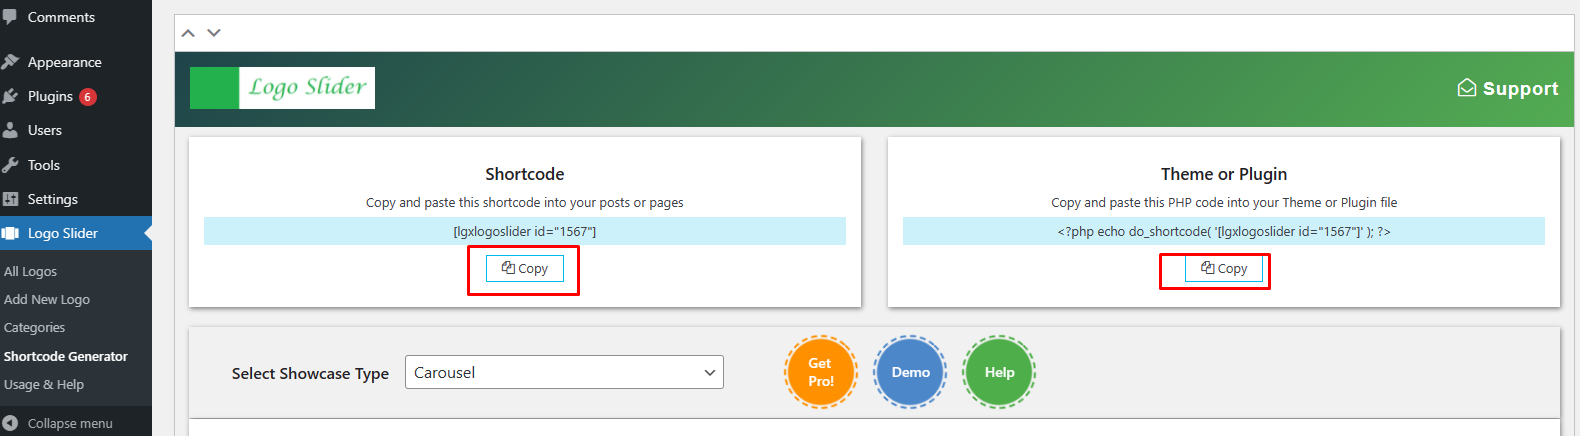

Use Shortcode

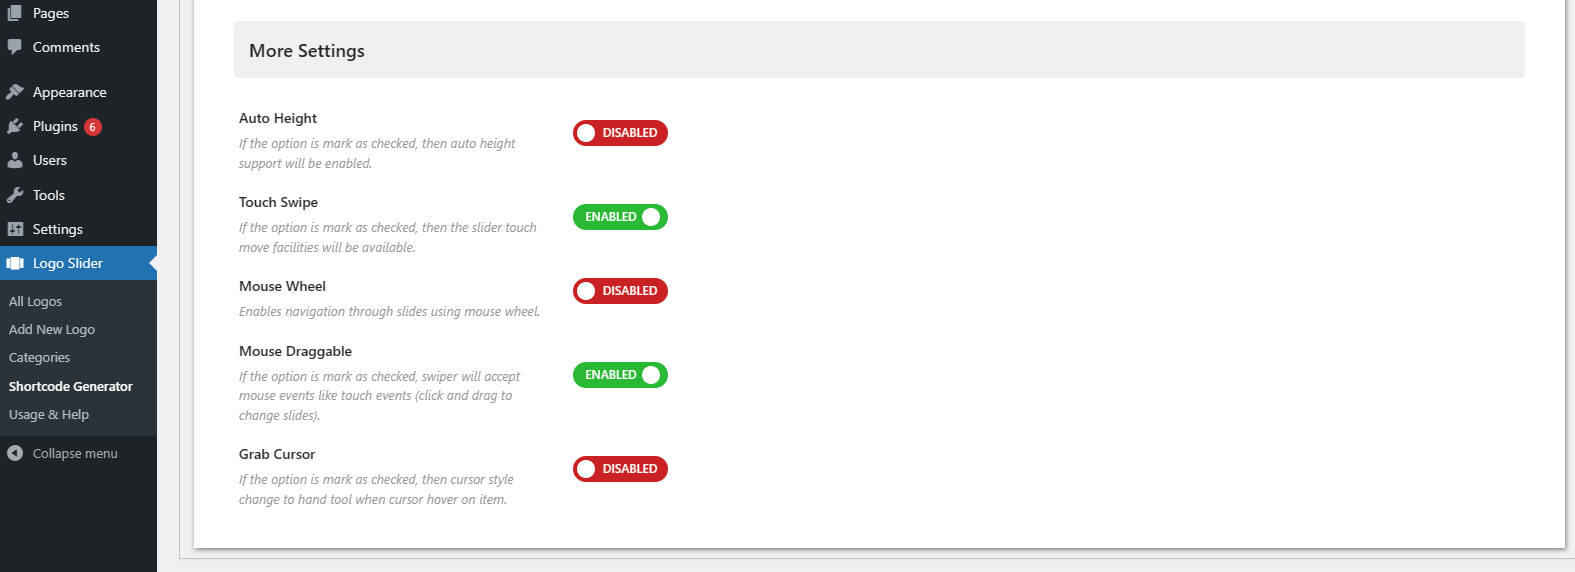
Showcase Generator Settings
Important:
This is an example settings option. Before altering/ using any option, please read its explanation carefully.

- Option Title.
- Explanation of the option.
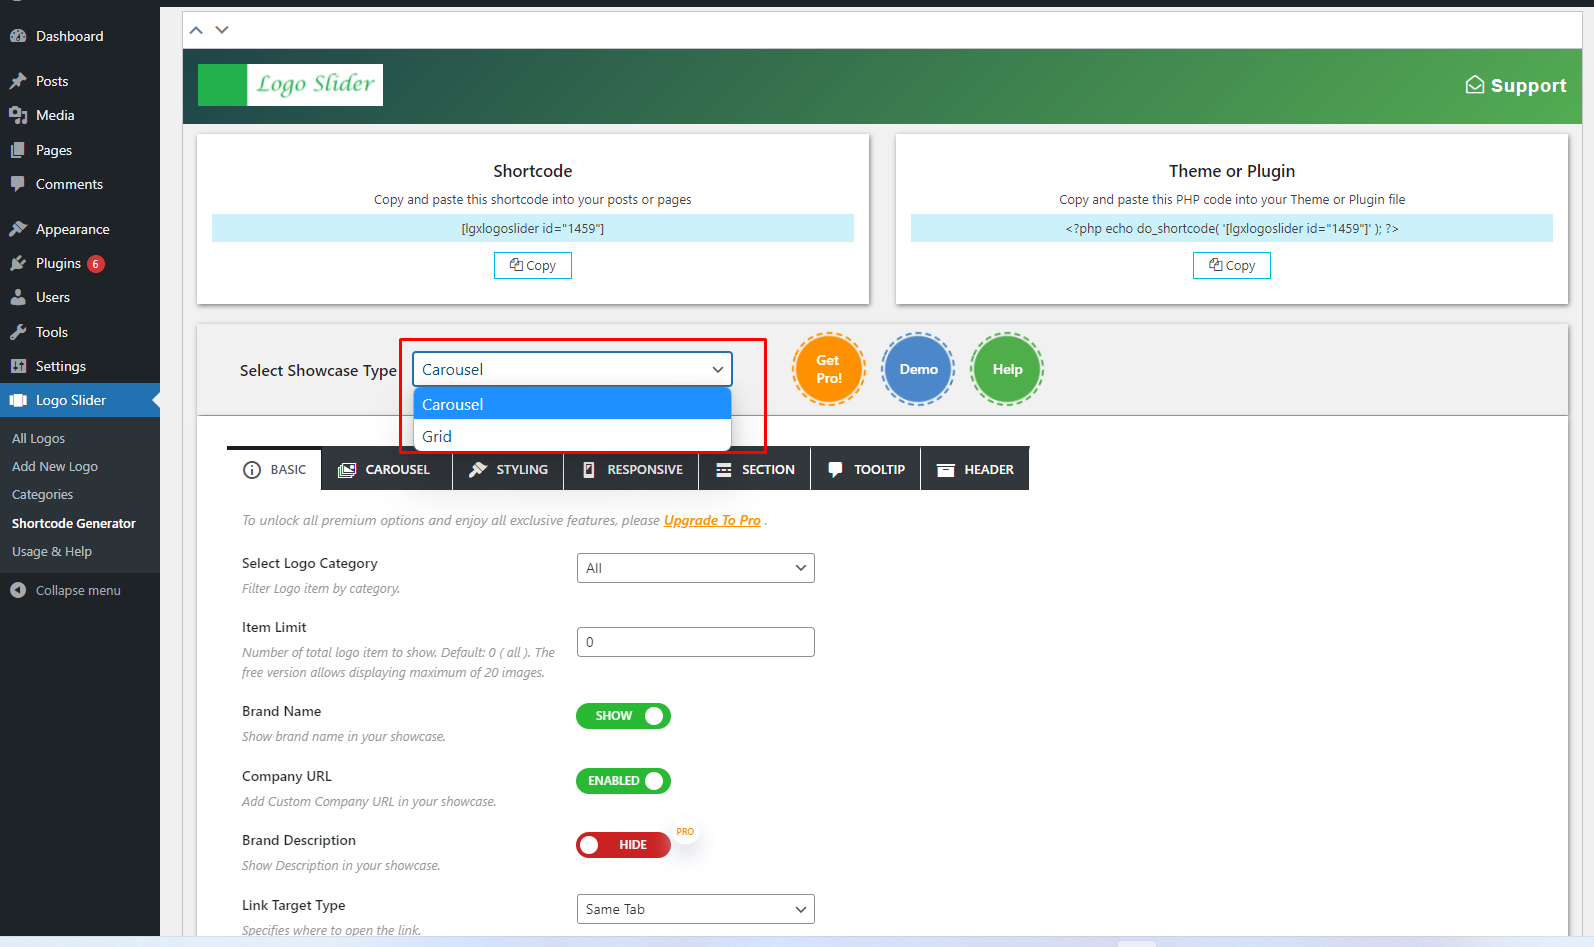
Showcase Type

Showcase Type: You can select showcase layout type from here. For example Grid, Carousel, etc. According to your selection, the showcase setting options will be arranged accordingly.
Basic
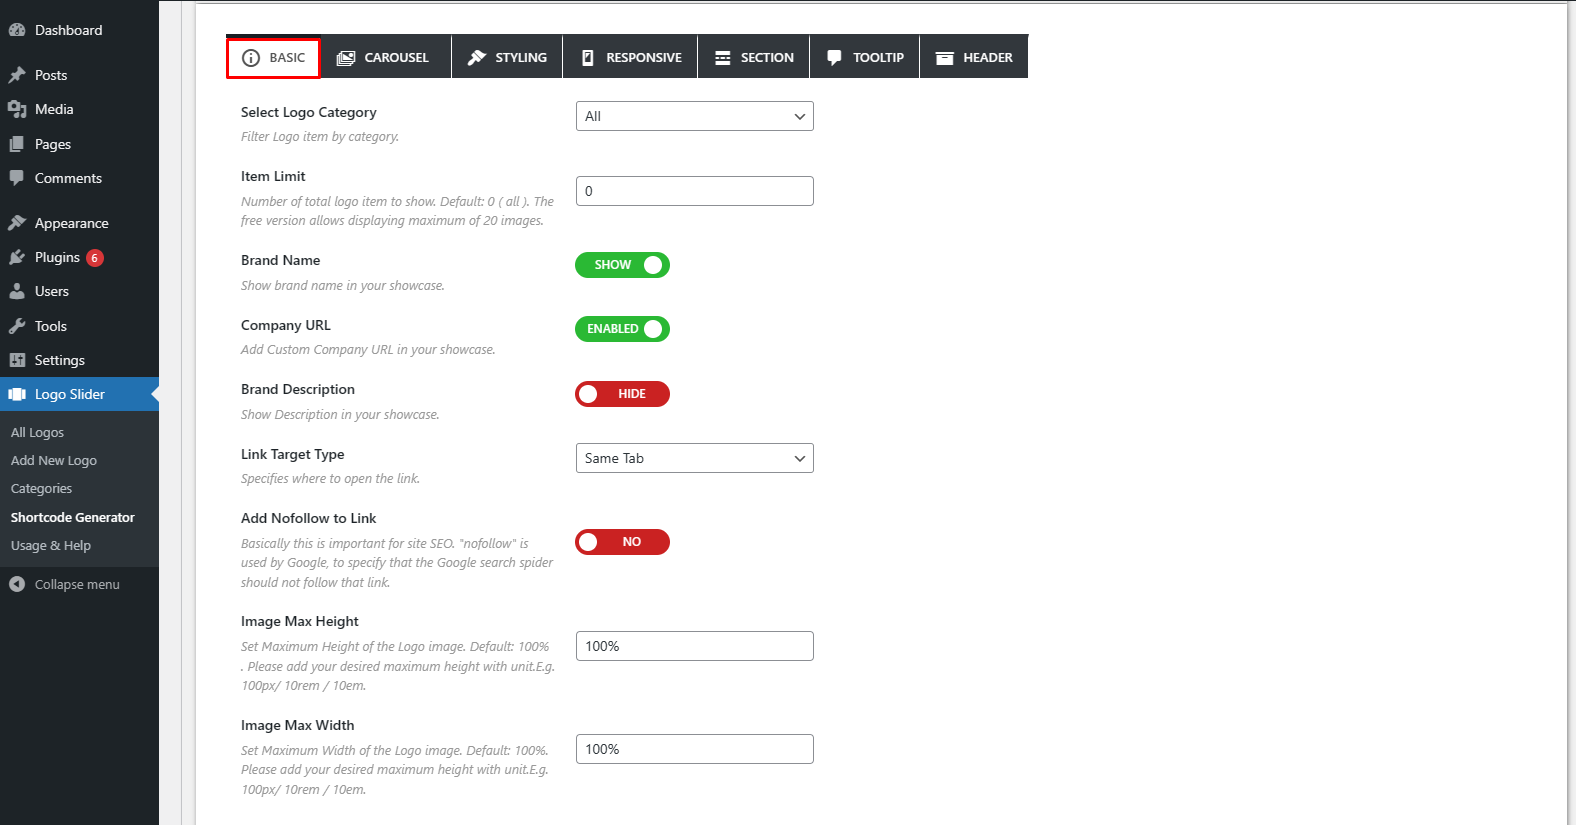
Basic Settings: This tab contains the most important and essential settings options for your showcase.
Grid
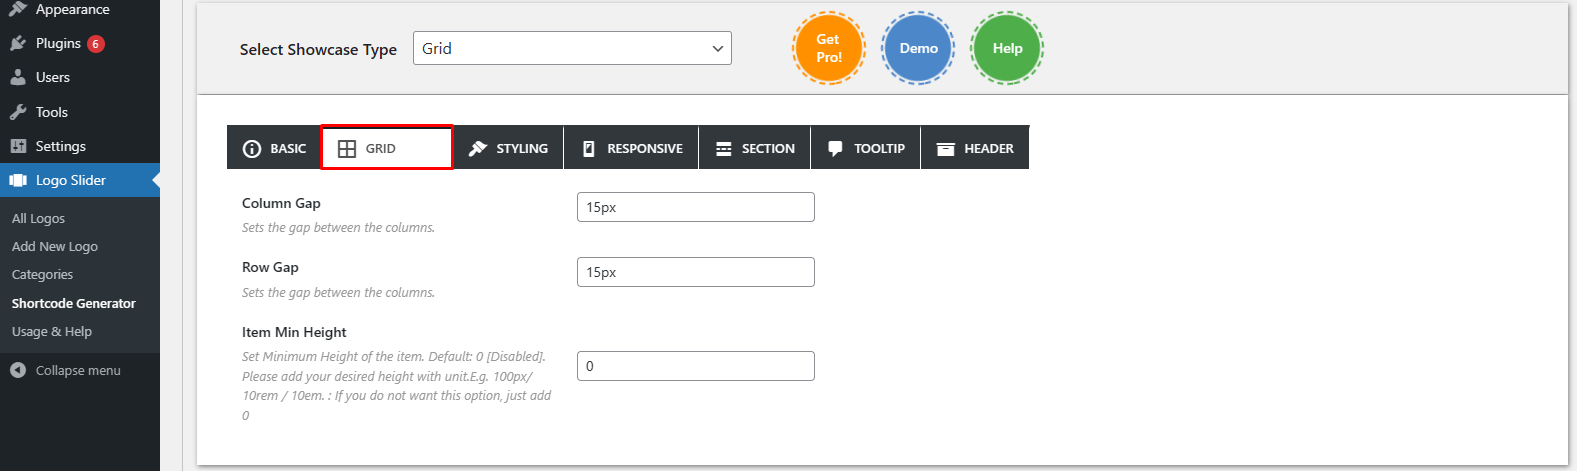
Grid Settings: These are settings options for Grid type showcase.
Carousel
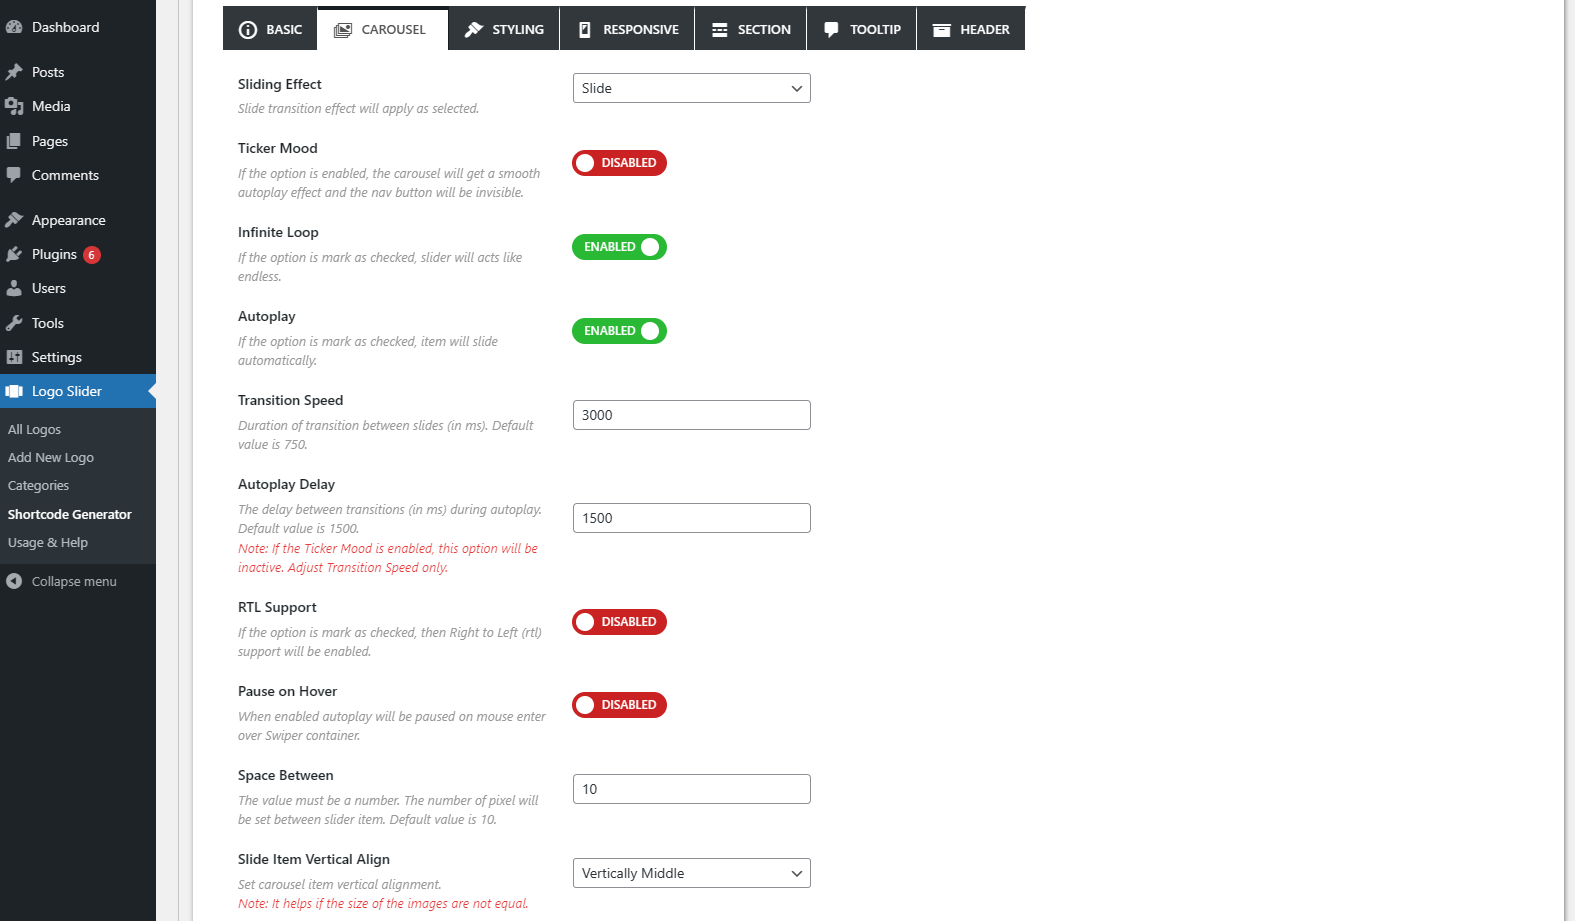
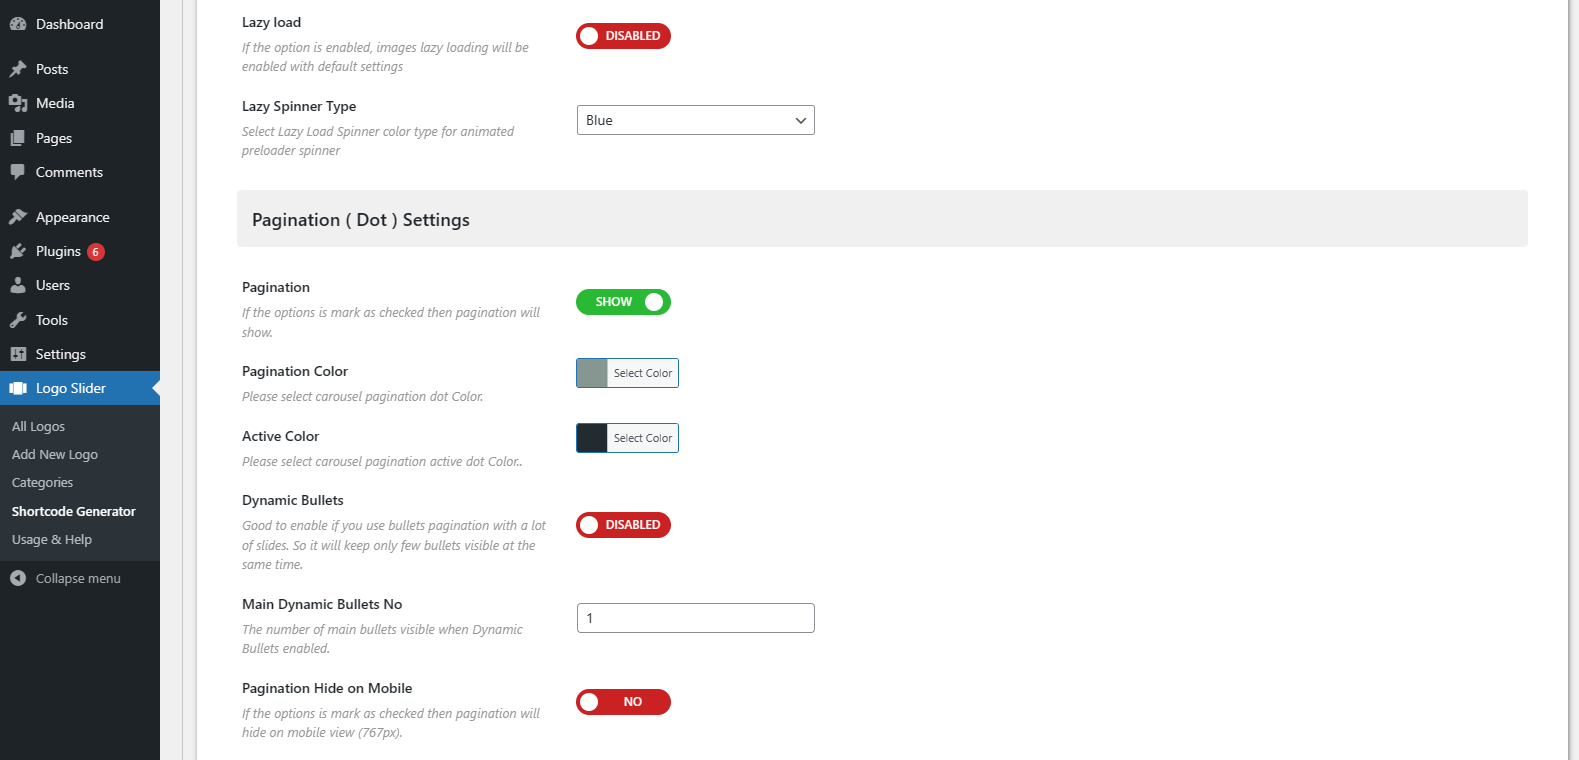
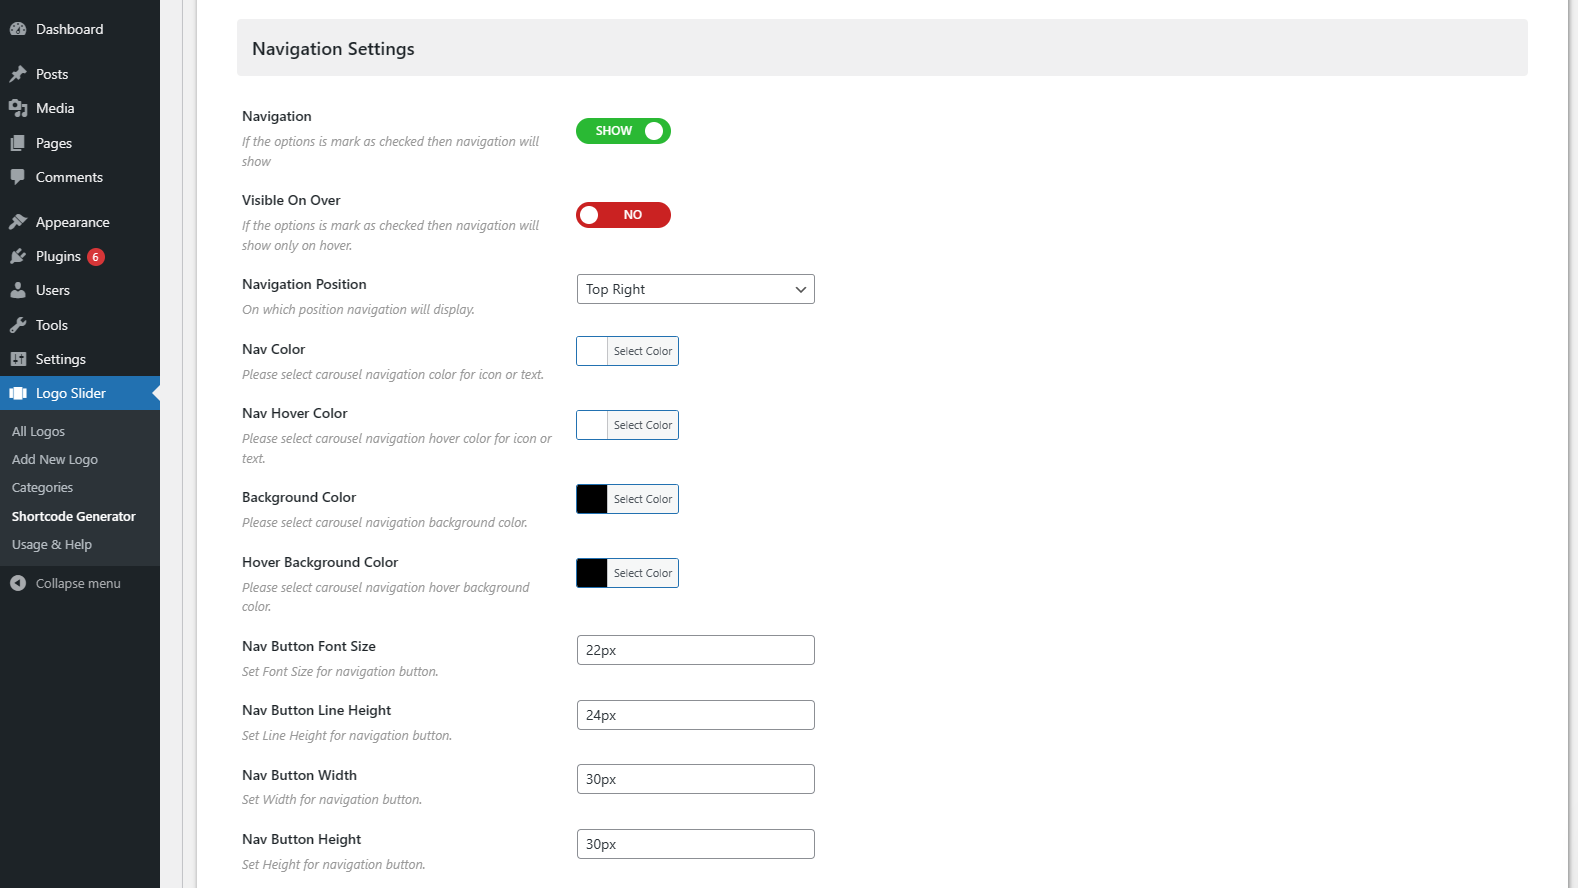
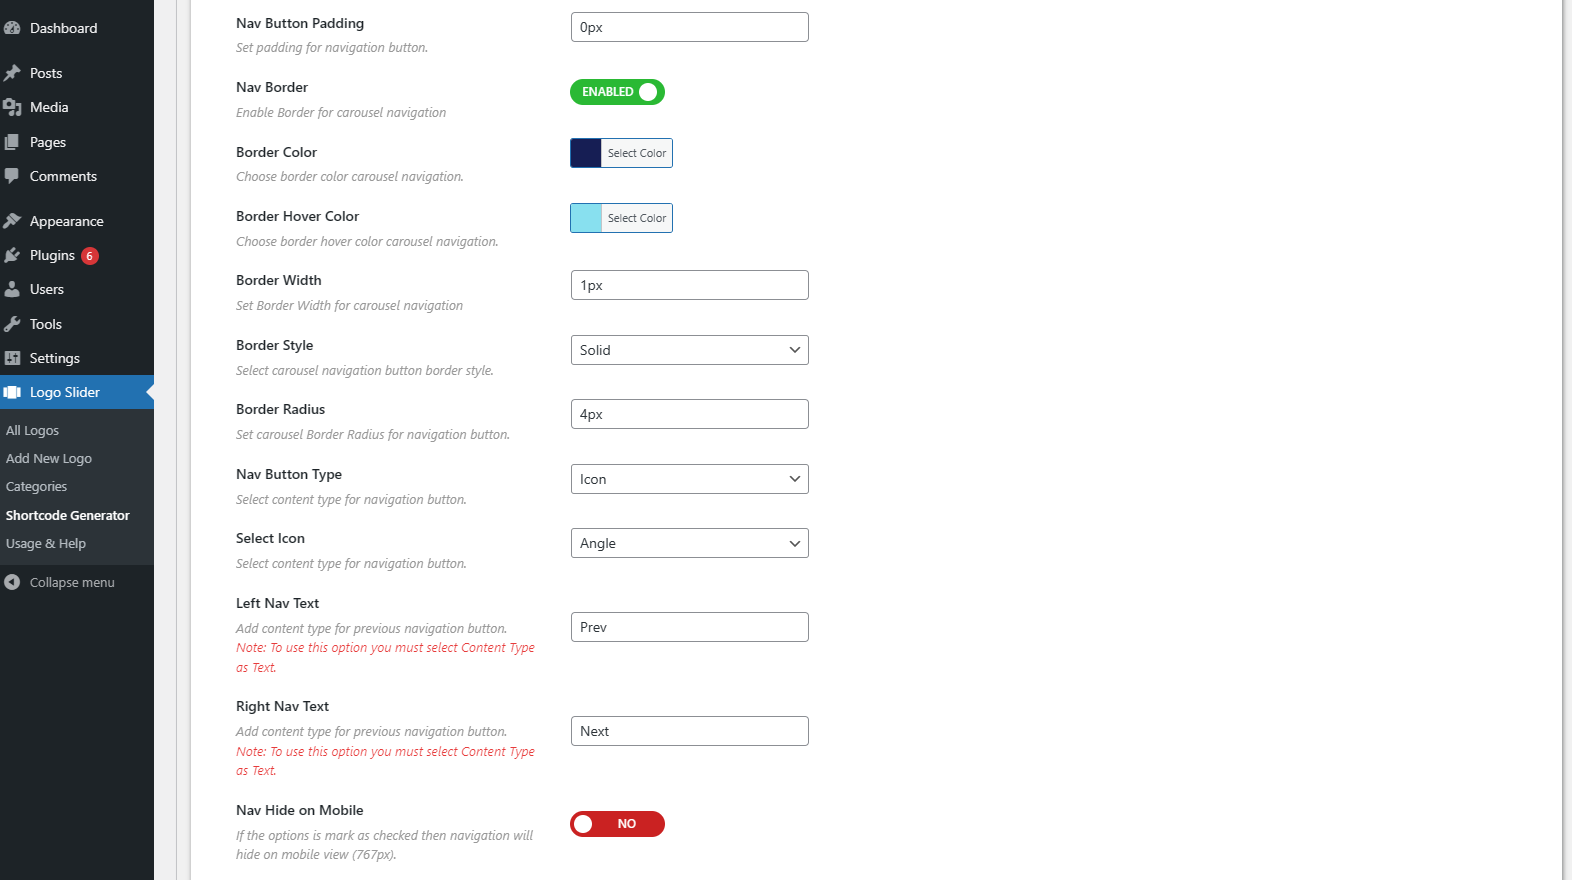
Carousel Settings: If you select "Carousel" as your showcase type, it will appear. Please customize all carousel options carefully.
Styling
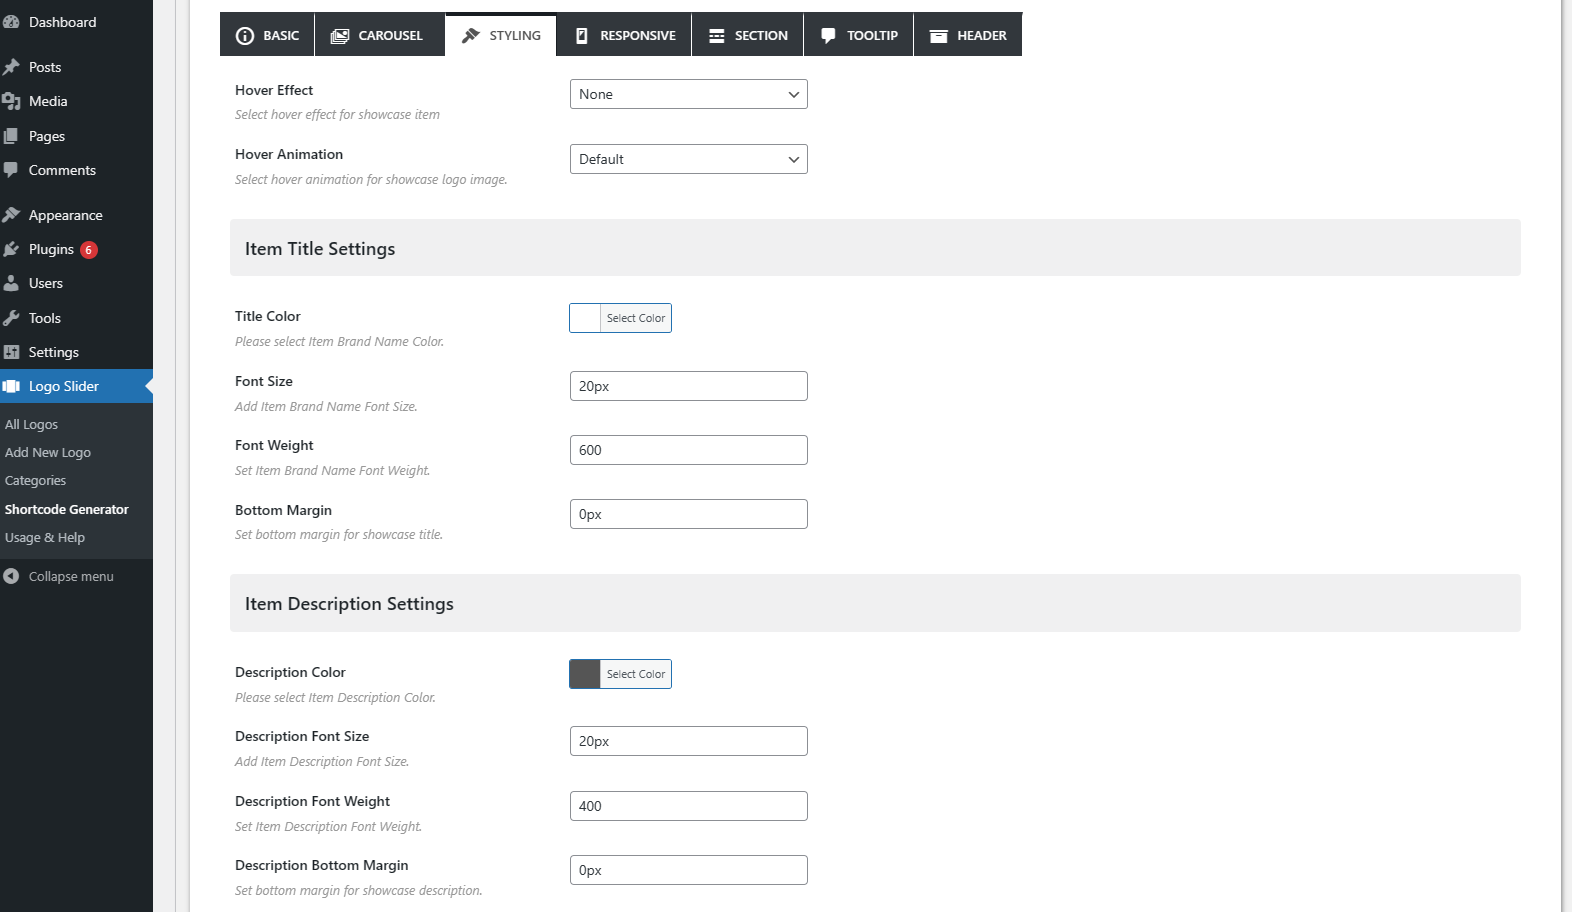
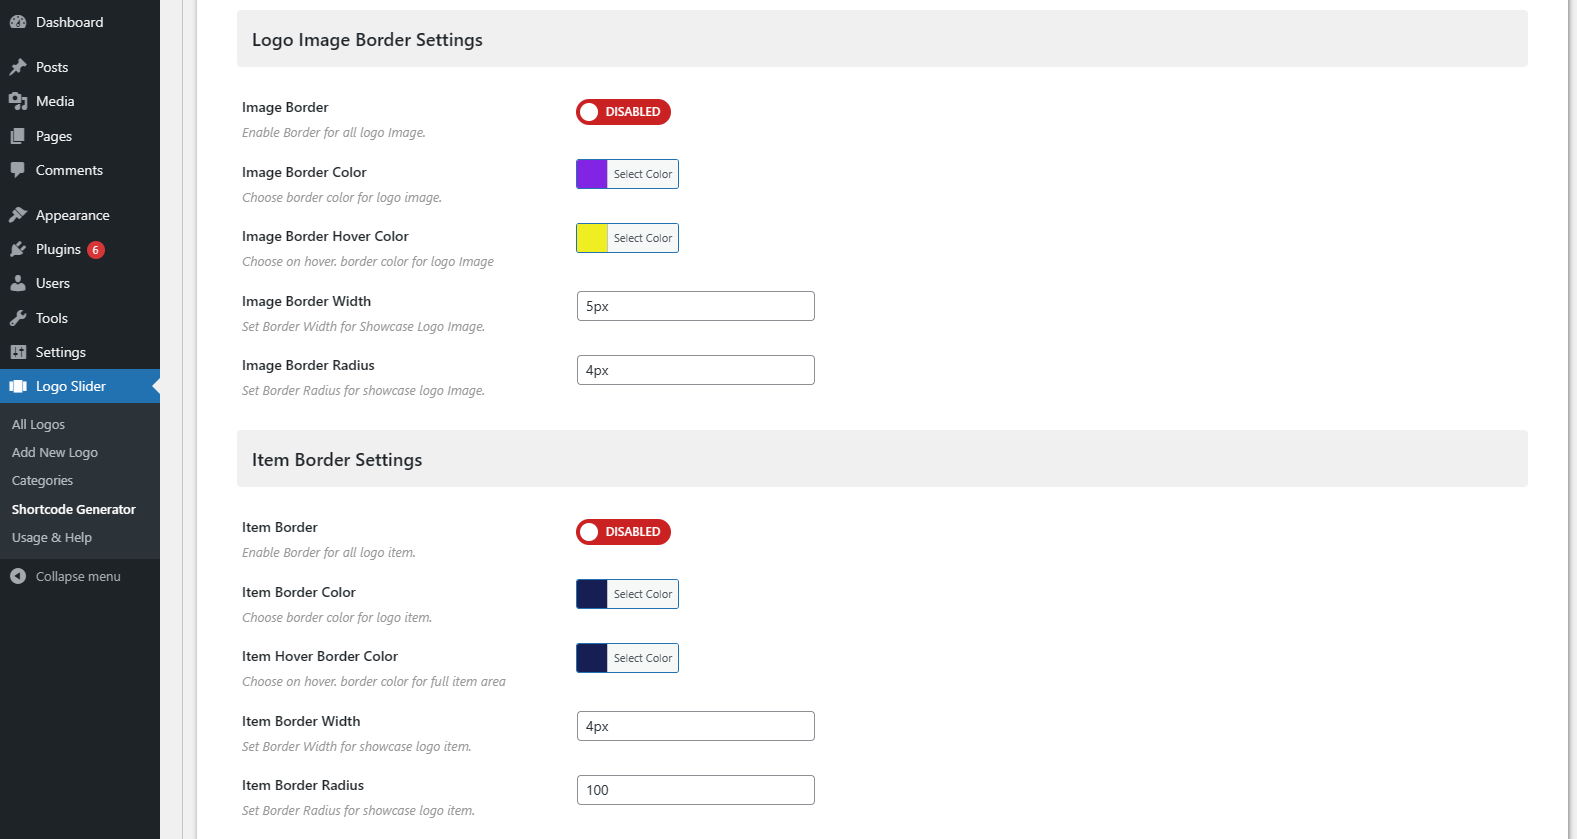
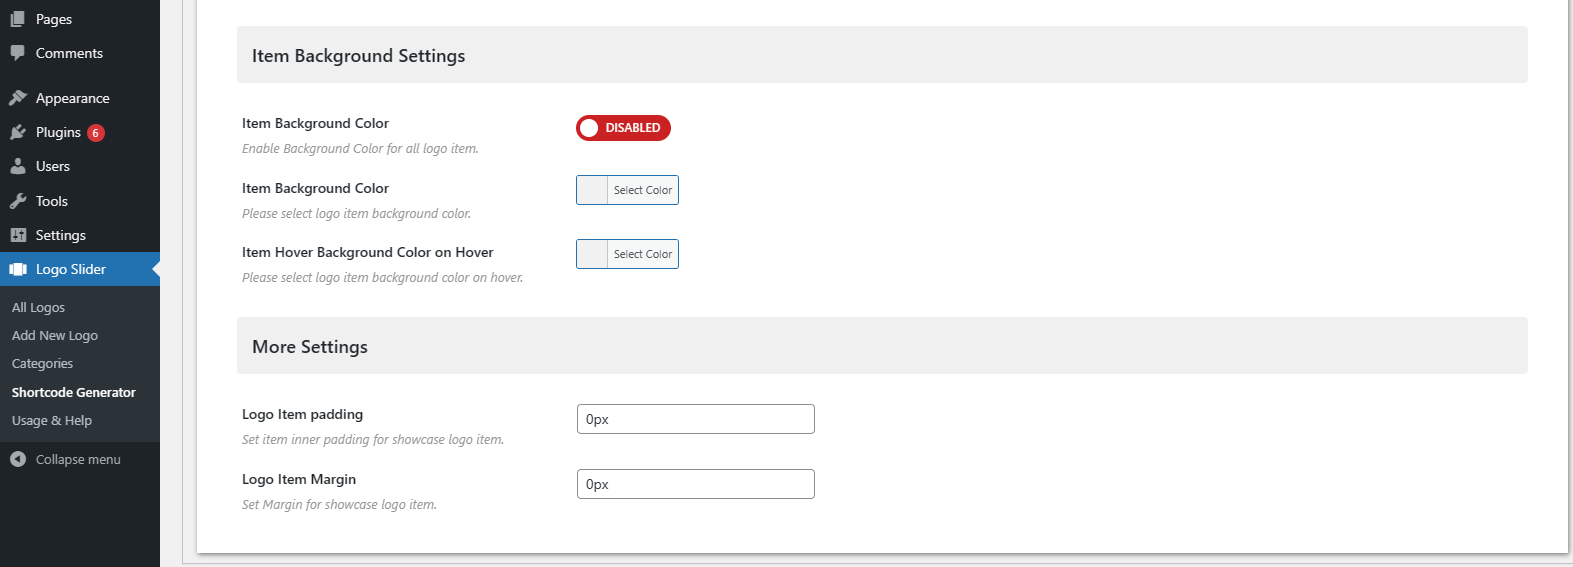
Styling Settings: This tab contains all style-related settings options for your showcase.
Responsive
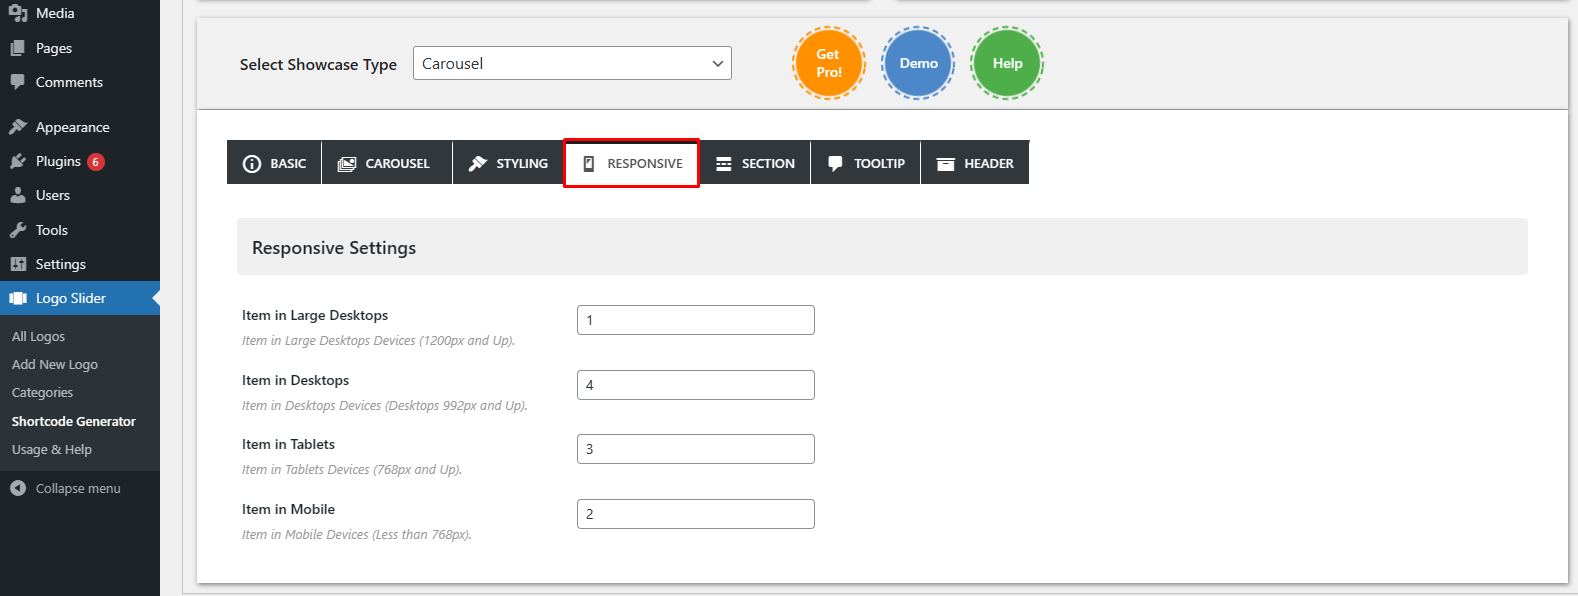
Responsive Settings: Control responsive behaviors of your showcase.
Section
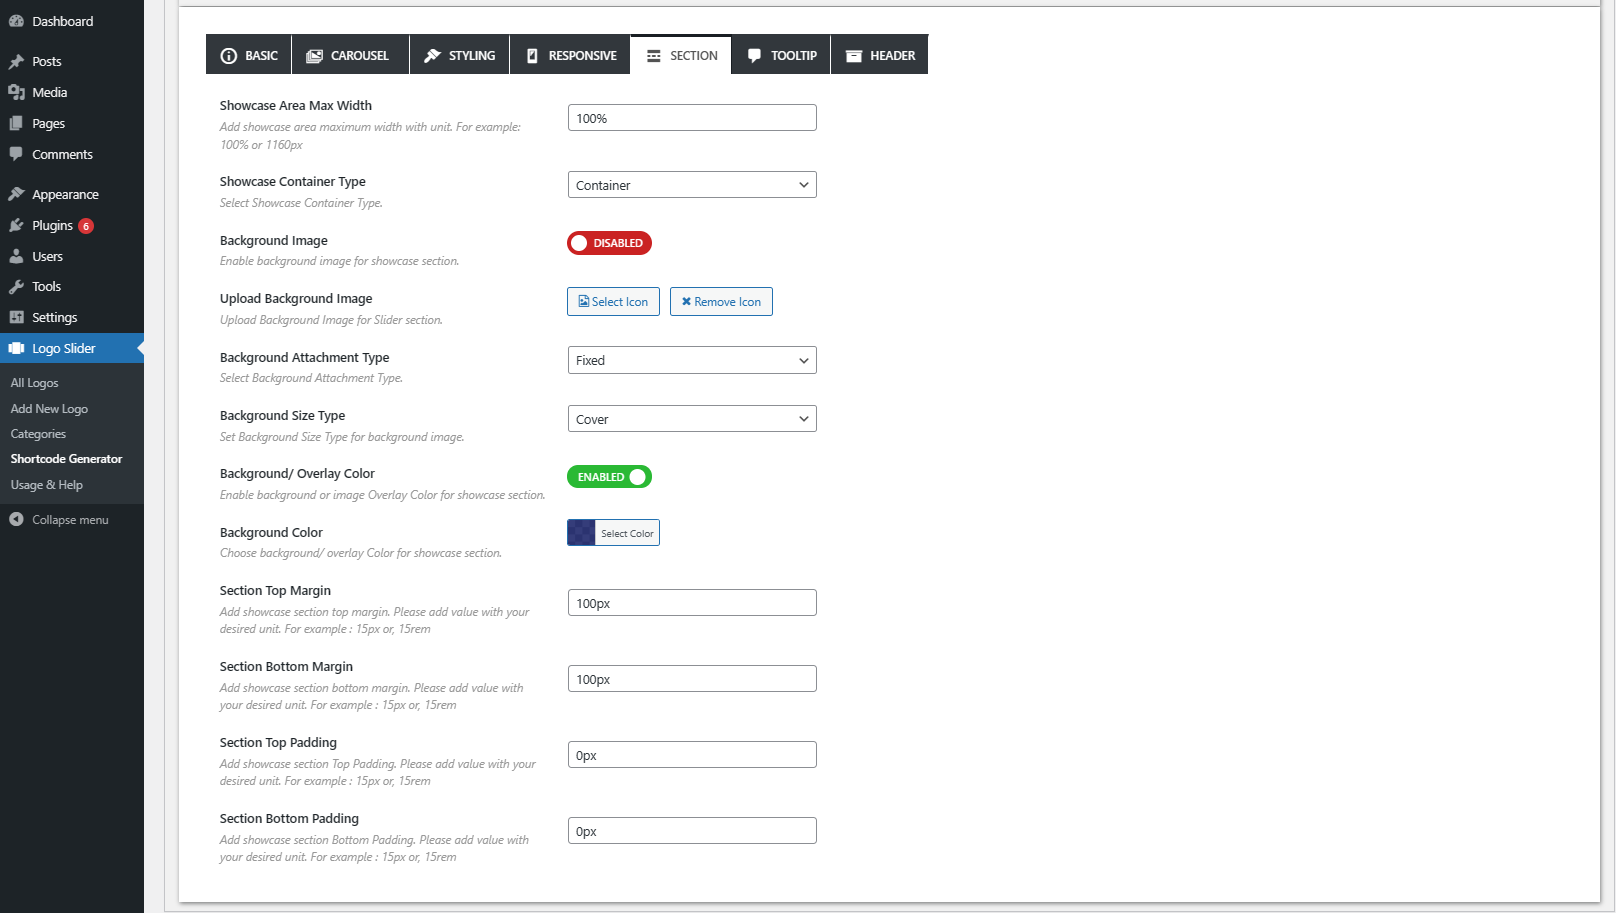
Section Settings: Showcase area background settings.
Tooltip
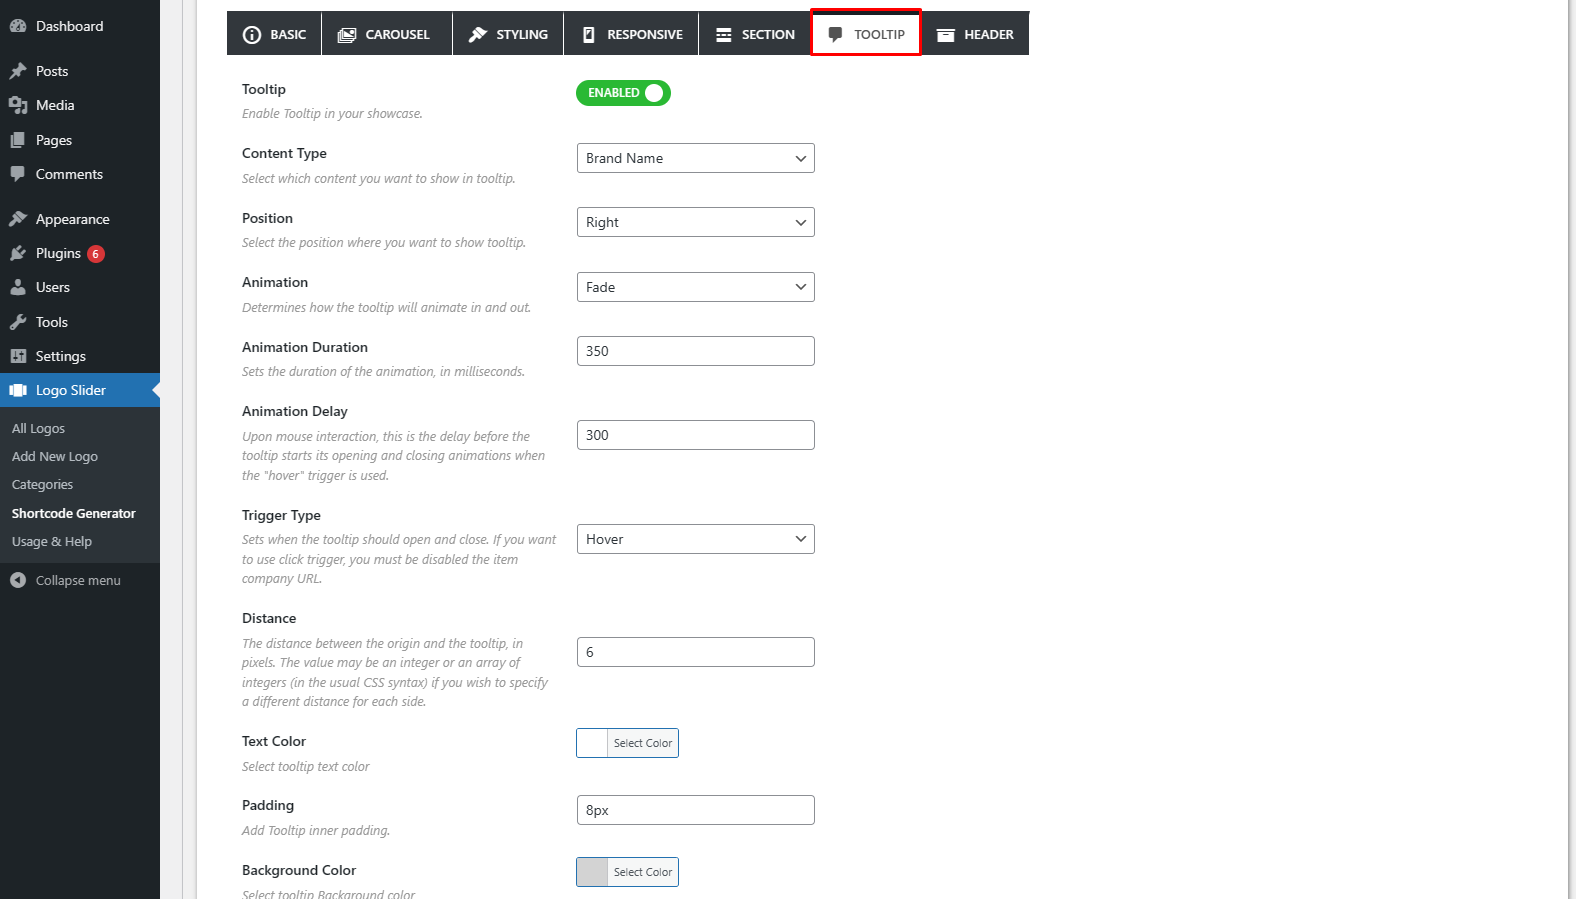
Tooltip Settings: Manage item tooltip from here.
Header
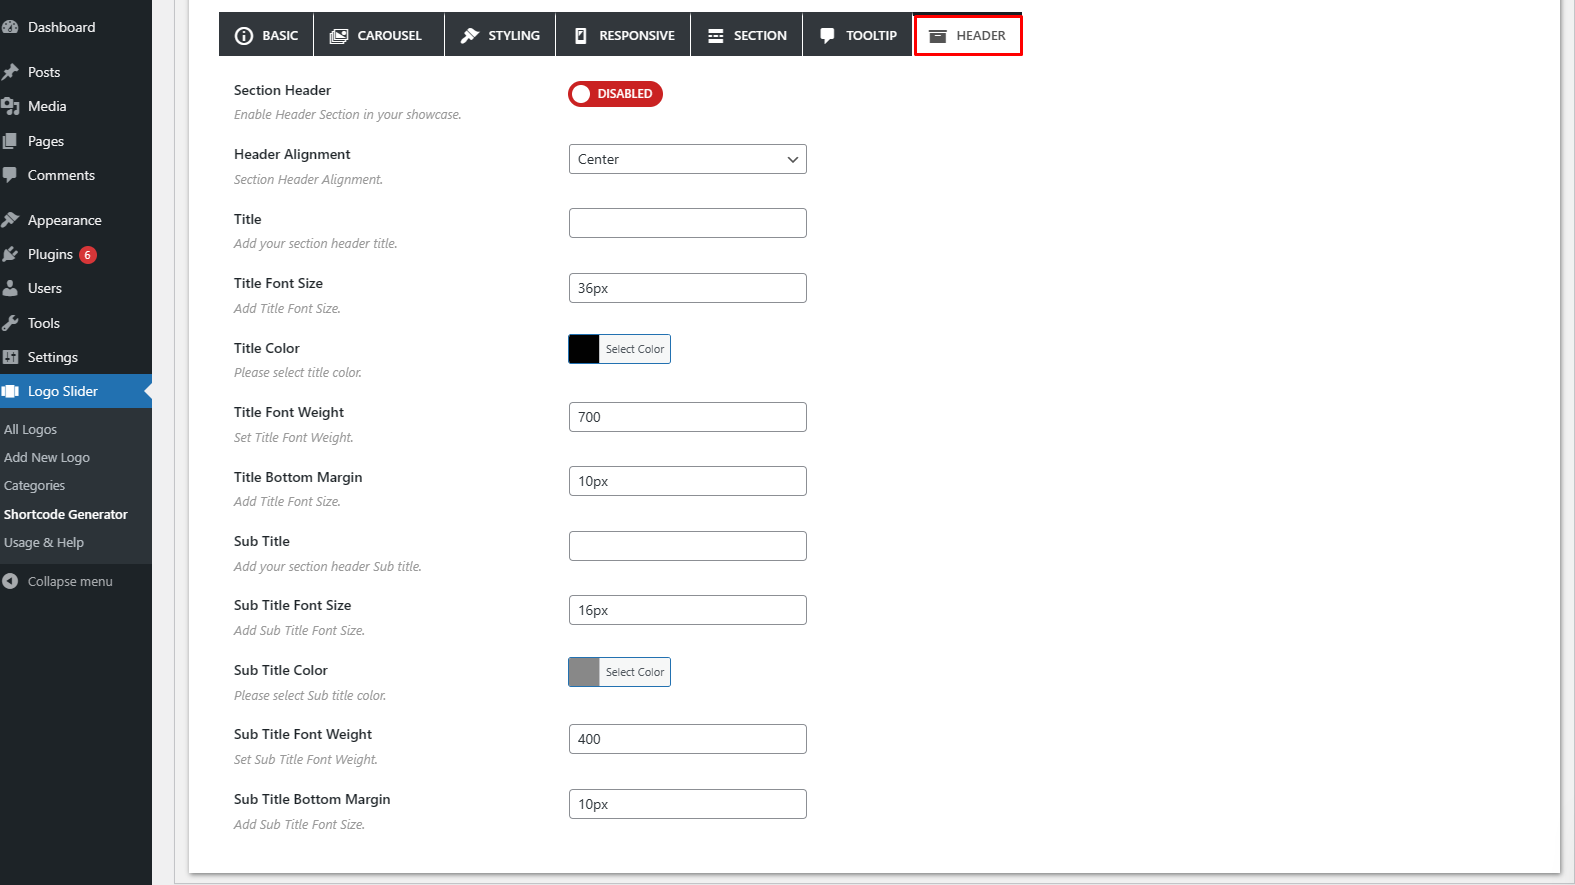
Header Settings: Manage header of showcase area from here.
Language and Localization
You can translate Logo Slider easily using Poedit App.
Download Poedit
There are several apps available to help you with translating.PO files. PoEdit is a popular one of them, and it’s available on every major platform. You can download it from here.
Start Translating
Open the default logo-slider-wp.pot file from your /wp-content/plugins/logo-slider-wp/languages/ folder. When you save your work PoEdit will generate you a.MO file which will be needed to apply for your work.
Name your files properly WordPress recognizes your localization by special formatting of file names. You will need to include the right language and country codes so it can identify what language is your work made for.
For example, a German localization would have the file names: logo-slider-wp-de_DE.po and logo-slider-wp-de_DE.mo. You must follow this syntax, including the dash, underscore, and lower or uppercase letters.
Apply Your Localization
Copy your newly created.PO and.MO files into the /wp-content/plugins/logo-slider-wp/languages/ folder. WordPress should use them immediately if you named your files properly.
If you want to learn more about how WordPress handles language translation then check out this link: http://codex.wordpress.org/Translating_WordPress
Upgrading to Pro!
Upgrading to Logo Slider Pro is very simple. If a user upgrades the plugin from the Free version to the Premium version, he has to download and install the Pro version manually. The pro version won’t be installed automatically.
- Purchase the pro version from here: Logo Slider Pro
- Download the Pro version from "My Account→ Dashboard→ Downloads"
- Install the Pro version manually.
- The free version will be deactivated automatically after installing the pro version of the plugin.
- Manage & Create showcase by using All premium feature .
No data will be lost. All the previous showcase Shortcodes will be carried to the pro version.
Get Support
If further help is needed you can go to our support page . We’ll do my best to help you.